
Learn how to create an ad-free and unlisted YouTube playlist then share or play it on loop. Use this workflow to quickly collect and share separate student video projects from student devices uploaded to a shared YouTube account or via Google Classroom, Google Drive, or Airdrop without combining into one large video. You can also use YouTube playlists to curate a collection of ad-free videos for students.
Why create a YouTube Playlist in the Classroom?
A teacher asked for help brainstorming ideas for uploading a video project she would create in iMovie that was too long for YouTube’s 15 minute video limit. While there is an easy enough way to verify an account and get longer video uploads, the other issue was bandwidth at her school would time out.
The other piece to the puzzle was that she was actually taking 25 short student videos and combining them in iMovie because she wanted to share the projects with families at an open house. Since the videos were student made, she wanted the videos unlisted, which basically means only people who she gave the link to could watch the video.
While searching for solutions, I realized I have run into similar issues…mainly when we do a video project and I wanted to share, students were either uploading their videos from their iPads directly to our class YouTube channel and I was sharing unlisted links one at a time OR I had them upload their videos to Google Drive (or use Air Drop) so that I could combine all 20+ videos into one iMovie. This was time consuming, but worth it if I wanted one unlisted link to share or use.
I’m relatively new to YouTube, so I was so excited to realize the ideal solution existed RIGHT within YouTube and was super easy and solved all problems mentioned above! When does that ever happen?!?!?
This workflow is for you if…
- You have many videos you want to share.
- You want the videos unlisted (meaning you don’t want them public on YouTube).
- You want to share the videos but you don’t want to create a link for each video (time-consuming!).
- You do not want to just play the videos straight through from YouTube because you are afraid of what random video YouTube will play at the end.
- You are tired of spending time combining videos on iMovie just for students to be able to watch their finished projects.
- You want to curate a collection of videos on a particular subject or topic for students to watch.
Collect Videos
How you collect videos is up to you. I prefer to have students upload directly from their iPads to one YouTube channel I created specifically to share with them. This way they are doing the uploading themselves and they are all ready on YouTube for me to work with.
For example, after completing the Water Bottle STEM Challenge, each student team had a slow-mo video of their toss. I wanted to collect all of the videos together so we could watch them and compare before they were tasked with designing their own water bottles.
Just keep in mind, when you set up your YouTube channel, you will need to share the email and password information with students. I made a free class Google Account for this purpose and that is the email I used to set up the account.
If that is not an option for you, you will need to collect student videos either by creating an assignment on Google Classroom and having students “turn in” finished videos or have students send them to one iPad (most likely your teacher one) via Air Drop. Both of these options mean you will have all of the videos on one device and will need upload them to your YouTube channel yourself.
Upload Videos to YouTube Account
I make sure all of the videos are on one YouTube Account that I can manage. If using an iPad, either you or your students can follow the visual step-by-step directions for uploading to YouTube from the iPad with this free guide.
When uploading, be sure you or students are setting the video as Unlisted as it will then not be public on YouTube. If you have made the judgement call that videos can be public, that is fine too – but just make sure EVERYONE is using the same setting for their videos.
Remove Ads from Videos
This is a key piece as you do not have control over what ads play. Since the videos are on one channel you can remove ads from the whole channel. To do that follow these steps (directly from Google):
- Step 1 – Go to Creator Studio. To start, make sure you’re logged into your Google/YouTube account and visit your YouTube page. …
- Step 2 – Channel Settings. …
- Step 3 – Advanced Settings. …
- Step 4 – Turn off Advertisements.
This only works if the videos were uploaded onto your channel and not for videos elsewhere on YouTube.
Make a Playlist & Add YouTube Videos to it
Assuming you uploaded all of the videos to one YouTube account, they are all in your video manager on your channel. Open that and use Control + Click to open the first video in a new tab. I usually go in student number order. At the bottom of the video is a plus sign that says ADD.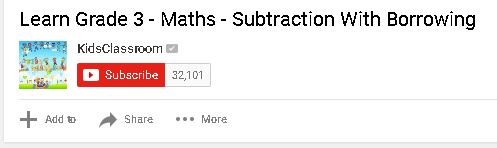
When you click it, you will see the playlist options open. For the first video, you will create a new playlist.
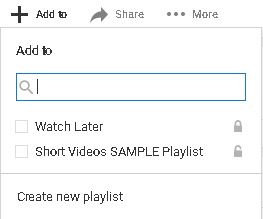
Here you can specify that you want your playlist Unlisted. You can also title the Playlist. I name it whatever the project is to stay organized. Add your first video that playlist. Go back to the Video Manager tab with all of the videos. I hit refresh to make sure the Playlist has populated to that page.
Now control+click on the next video. Click the ADD button again and you will see the Playlist you just created. Click it to add this second video. Repeat this process until all videos are added. If you are working in one YouTube account, this goes VERY quickly.
Set Playlist Settings
Once all of your videos are added to your playlist, click the hamburger menu button in the top left of YouTube. You should see the name of your playlist. Click it to open it.
You will see the name of the playlist with all of the videos. There are some settings you can adjust here so check them out if it interests you. 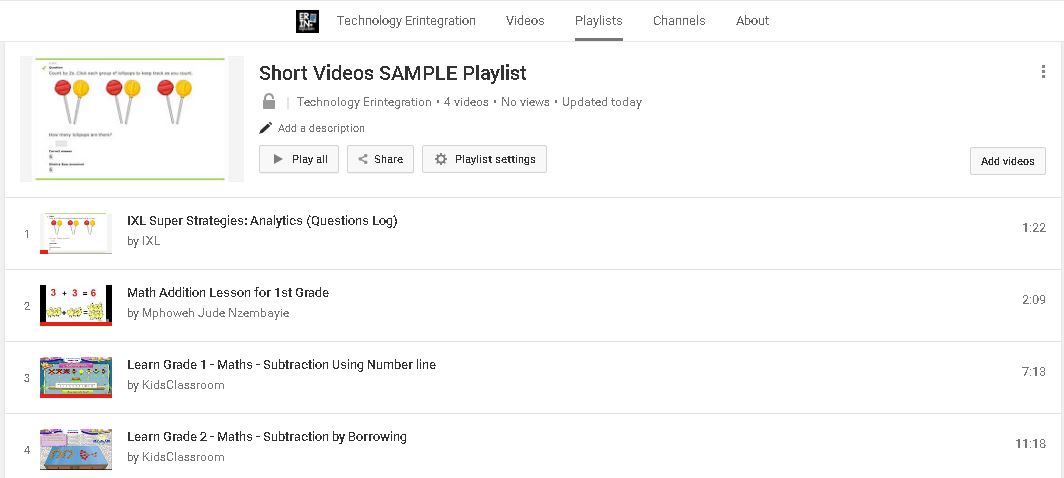 In our case we just need to make sure our Playlist is unlisted.
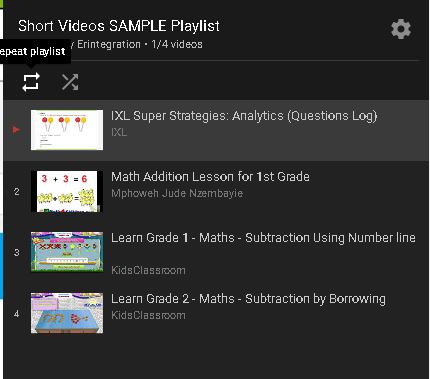
 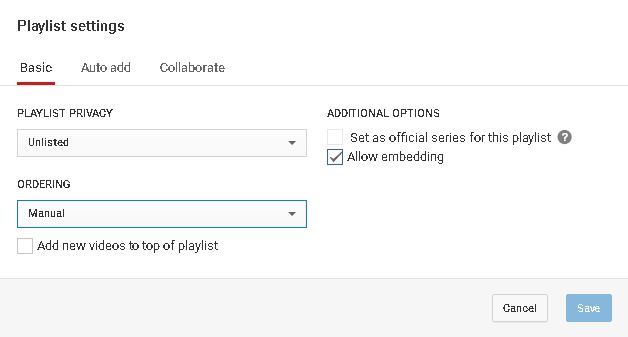 I also click the REPEAT button to toggle that on so after each video plays in the playlist it will return to the start of the playlist and do it again. That will avoid any “recommended” auto-playing videos.
You can also set the videos to full screen here if you are setting this up to project on Open House or as a lesson closure.
Share Playlist
Click the share button and get the URL of the YouTube playlist to share however you see fit. You only need to share this single URL as it will open the playlist and the person who clicks will be able to watch all of the unlisted videos in that playlist.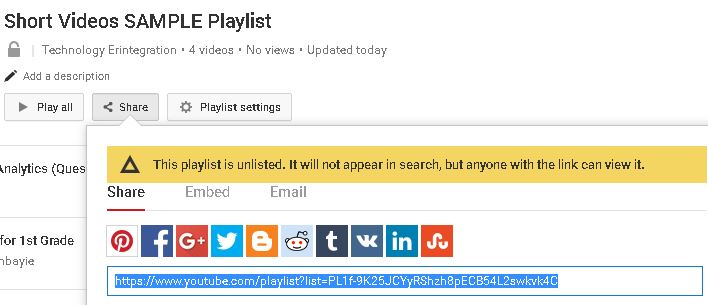
How easy was that? I’m seriously face palming that I didn’t learn this sooner as it would have saved SO. MUCH. TIME. In general the whole “Playlist” feature is one that is underused in the classroom.
You could make playlists of videos that aren’t “yours” for example, a playlist of Fraction videos for students to watch in math. In fact the pictures I used are from a Playlist of math videos – I did not use student work since most of our videos have faces (hence why we keep them unlisted in the first place!). But either way, the Playlist set-up and settings are the same whether they are your own videos or someone else’s.
I’m thrilled that I no longer need to combine projects in iMovie just to share them and I love that I can make multiple YouTube playlists that I can link to, create QR codes to or email to parents.